
My friend Radan wrote a blog post a few weeks ago about choosing between Hotwire or a frontend framework in your Rails project.
The article assumes that using a frontend framework means having a Single Page Application (SPA), which is completely isolated from the server application. This SPA is dealing with its own state and logic, and consuming a (most likely) JSON API provided by the Rails server application. The server application also has its own state and logic to manage.
Although this is the most common way [citation needed] of setting things up, you can also setup your frontend framework to not manage any shared state. And we can set such an application up with Inertia.
Rails + Inertia + React + goodies
I was introduced to Inertia recently by my friend Martin who is using it in his new product. He hired me recently to help him build the Minimum Viable Product and that’s how I discovered the library. Martin chose Inertia because he was migrating a prototype that he had built with Next.JS and wanted to re-use the React component library. But he also didn’t want the frontend to be a SPA and so Inertia made sense here.
The Inertia project was started for Laravel and has since been adapted to loads of frameworks, including Rails which we are going to use here.
The main benefit of Inertia is that the frontend only deals with component level state and avoids any shared or global state. It functions as a “pure” component library with minimal logic and state management in the frontend. For the rest, it just uses the backend as the source of truth: validation, permissions, state management, business logic, etc. You use it as you would with server-side rendering, but the view layer is different. As per the documentation:
When Inertia makes an XHR visit, the server detects that it’s an Inertia visit and, instead of returning a full HTML response, it returns a JSON response with the JavaScript page component name and data (props). Inertia then dynamically swaps out the previous page component with the new page component and updates the browser’s history state.
This is, by the way, pretty similar to how Hotwire’s Turbo operates. But let’s not get sidetracked.
Let’s see how it works in practice. For this example, I’m using inertia_rails in the backend, React + @inertiajs/react in the frontend. I’m also using Vite via vite_rails because it makes everything simpler. There will also be a few goodies that I will introduce along the way.
Step 0: Rails + Vite setup
The first 2 commits of the demo app is the base setup:
- commit 1:
rails new - commit 2:
- add
vite_railsand runbundle exec vite install - remove esbuild + jsbundling, create the DB, add a HomeController to confirm that the app is set up correctly
- add
Step 1: Inertia setup
The inertia_rails gem has some pretty good “Getting started” documentation. In the demo app, we can see in commit 3 how it is setup:
- add the
inertia_railsgem, the@inertiajs/react,reactandreact-domnpm packages - replace the rails
rootroute + HomeController by the inertia root route. - setup inertia in
application.jsx+ the (root) page component inpages/home/index.jsx
That last bullet point is the crux of the inertia setup in the frontend. I’m copying the entirety of the code here for clarity:
// app/frontend/entrypoints/application.jsx
//
// Entry point for the build script in your package.json
import React from "react";
import { createInertiaApp } from "@inertiajs/react";
import { createRoot } from "react-dom/client";

// You need Vite to do `import.meta.glob`.
// It's not necessary to run inertia, just simpler to implement than
// importing each file individually.
//
// This little piece of magic (plus part 2 bellow) is what let's you
// add pages without importing all of them individually. For ex, if
// your Rails controller does:
//   `render inertia: "posts/index"`
// You can simply add `/pages/posts/index.jsx` which exports a React
// component as default function, and that component will be rendered
// (via part 2 bellow).
const pages = import.meta.glob("../pages/**/*.jsx");

document.addEventListener("DOMContentLoaded", () => {
  createInertiaApp({
    resolve: async (name) => {
      // part 2: find the correct page based on name
      return (await pages[`../pages/${name}.jsx`]()).default;
    },
    setup({ el, App, props }) {
      createRoot(el).render(<App {...props} />);
    },
  });
});
// app/frontend/pages/home/index.jsx
import React from "react";

export default function Index() {
  return <div>Hello World from Inertia!</div>;
}
Step 2: Pass props
Our setup is done, it’s time to build something. Since I have no imagination, let’s make a blog with posts (id: primary_key, title: string, body: text) that we can CRUD.
The home page is going to be posts#index. First of all, let’s render every blog title. As described in the documentation of inertia_rails, the backend setup is pretty straightforward (full code in commit 4 of the demo app):
# config/routes.rb
Rails.application.routes.draw do
  inertia "/" => "home/index"
  resources :posts, only: [:index]
end

# app/models/post.rb
# 4 records seeded in database
class Post < ApplicationRecord
end

# app/controllers/posts_controller.rb
class PostsController < ApplicationController
  def index
    posts = Post.all.map { _1.slice(:id, :title) }

    render inertia: "posts/index", props: { posts: posts }
  end
end
Now we build the component. Here the trick is to use the usePage hook to get the props:
// app/frontend/pages/posts/index.jsx
import React from "react";
import { usePage } from "@inertiajs/react";
export default function Index() {
const { posts } = usePage().props;
return (
<div>
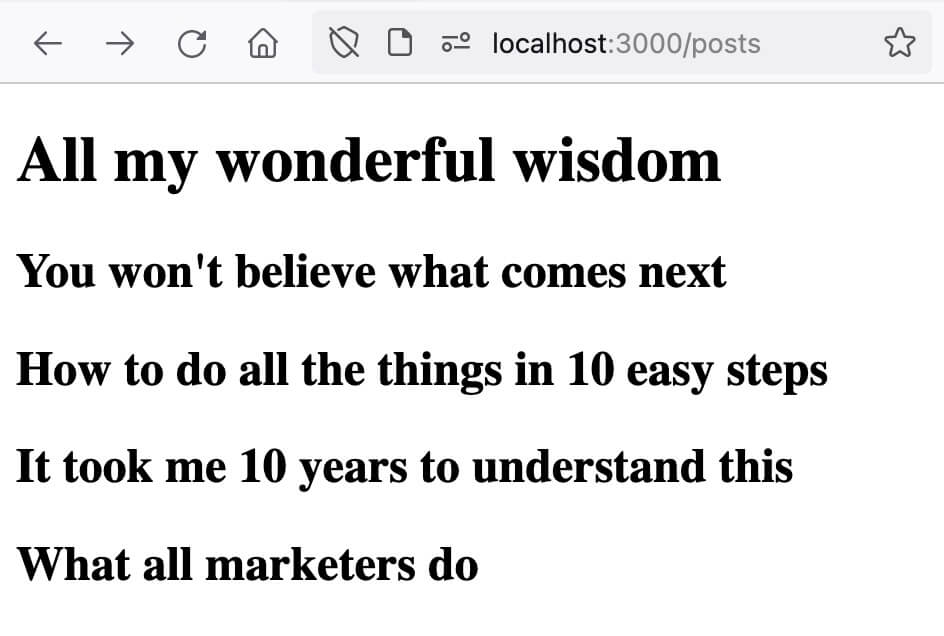
<h1>All my wonderful wisdom</h1>
{posts.map((post) => (
<h2 key={post.id}>{post.title}</h2>
))}
</div>
);
}
And if we visit the /posts path, tada!
Step 3: Add some goodies
Now, let’s say that we want each of these post titles to link to the full post. This is where it gets interesting. In a conventional SPA, you would now need a router of some sort, fetching data from the backend, who would render some JSON for example, and then build the component in the frontend.
But with Inertia, none of this. We can use the Link component and simply link to the post (show) endpoint (full code in commit 5 of the demo app):
// app/frontend/pages/posts/index.jsx
import React from "react";
import { usePage, Link } from "@inertiajs/react";

export default function Index() {
  const { posts } = usePage().props;

  return (
    <div>
      <h1>All my wonderful wisdom</h1>
      {posts.map((post) => (
        <h2 key={post.id}>
          <Link href={`/posts/${post.id}`}>{post.title}</Link>
        </h2>
      ))}
    </div>
  );
}

// app/frontend/pages/posts/show.jsx
import React from "react";
import { usePage } from "@inertiajs/react";

export default function Index() {
  const { post } = usePage().props;

  return (
    <div>
      <h1>{post.title}</h1>
      <p>{post.body}</p>
    </div>
  );
}
And implement the backend:
# config/routes.rb
Rails.application.routes.draw do
  # [...]
  resources :posts, only: [:index, :show]
end

# app/controllers/posts_controller.rb
class PostsController < ApplicationController
  # [...]

  def show
    post = Post.find(params[:id]).slice(:title, :body)

    render inertia: "posts/show", props: { post: post }
  end
end
We already eliminated the frontend routing. But there is one thing I don’t like here:
<Link href={`/posts/${post.id}`}>{post.title}</Link>
I don’t like the hard-coding of this route. Because now I have 2 states to keep in sync: the backend route, and the frontend calling of it. If I change one, I have to remember to change the other. No good. Also, that just feels dirty to hard code paths.
Let’s solve this with the js_from_routes gem1 to help us here.
After adding the gem and the companion npm package, we can configure the Rails routes so that all paths are exported:
Rails.application.routes.draw do
  # [...]
  # JS from routes exports
  defaults export: true do
    resources :posts, only: [:index, :show]
  end
end
If we restart our server, the JS files will be automatically generated (the gem has a built-in listener). But we can also manually generate them with bin/rake js_from_routes:generate
We can now use the path in the JS file:
import React from "react";
import { usePage, Link } from "@inertiajs/react";
import { posts as postsApi } from "@/api";

export default function Index() {
  const { posts } = usePage().props;

  return (
    <div>
      <h1>All my wonderful wisdom</h1>
      {posts.map((post) => (
        <h2 key={post.id}>
          <Link href={postsApi.show.path(post)}>{post.title}</Link>
        </h2>
      ))}
    </div>
  );
}
Works perfectly!

Step 4: Inertia forms, meh
Now let’s allow the user to create a new blog post. Basically, we need a simple form that can do a POST request. The main gotcha is the dealing with CSRF tokens. Let’s build the feature and ignore CSRF protection for now.
Inertia provides the useForm hook to help us here (full code in commit 6 of the demo app):
# config/routes.rb
Rails.application.routes.draw do
  # [...]
  defaults export: true do
    resources :posts, only: [:index, :show, :create]
  end
end

# app/controllers/posts_controller.rb
class PostsController < ApplicationController
  # [...]

  def create
    Post.create!(params.require(:post).permit(:title, :body))

    redirect_to posts_path
  end
end
// app/frontend/pages/posts/index.jsx
import React from "react";
import { usePage, Link } from "@inertiajs/react";
import { posts as postsApi } from "@/api";

import Form from "./_form";

export default function Index() {
  const { posts } = usePage().props;

  return (
    <div>
      <h1>All my wonderful wisdom</h1>
      {posts.map((post) => (
        <h2 key={post.id}>
          <Link href={postsApi.show.path(post)}>{post.title}</Link>
        </h2>
      ))}

      <hr />

      {/* Let's add the form down here*/}
      <Form />
    </div>
  );
}

// app/frontend/pages/posts/_form.jsx
import React from "react";
import { useForm } from "@inertiajs/react";
import { posts } from "@/api";

export default function PostForm() {
  const { data, processing, post, setData, reset } = useForm({
    title: "",
    body: "",
  });

  const submit = (e) => {
    e.preventDefault();

    post(posts.create.path(), { onSuccess: () => reset() });
  };

  return (
    <form onSubmit={submit}>
      <div>
        <label htmlFor="text-input">Title</label>
        <input
          id="text-input"
          type="text"
          value={data.title}
          onChange={(e) => setData("title", e.target.value)}
        />
      </div>
      <div>
        <label htmlFor="body-input">Body</label>
        <textarea
          id="body-input"
          value={data.body}
          onChange={(e) => setData("body", e.target.value)}
          rows="4"
        ></textarea>
      </div>
      <button type="submit" disabled={processing}>
        Create
      </button>
    </form>
  );
}
Now let’s try to create a post and…
It works?!? Where is my CSRF protection?
Ok let’s inspect the request:
As we can see, a X-XSRF-TOKEN header is sent with the Request:
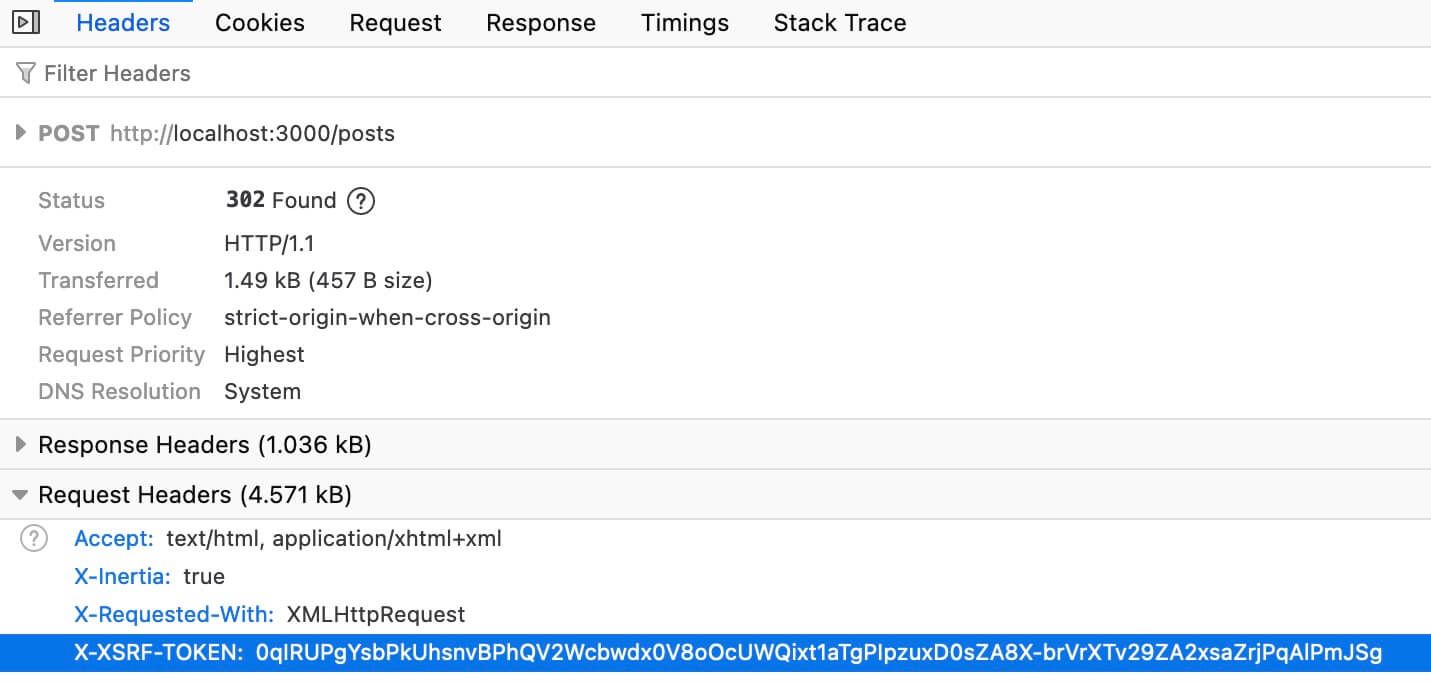
Inertia form uses the axios library to perform requests. Axios automatically checks for the existence of an XSRF-TOKEN cookie (which Rails provides). If it is present, Axios will then include the token in an X-XSRF-TOKEN header for any requests it makes. Mind the XSRF instead of CSRF, so by default, Rails would not recognize it (it recognizes X-CSRF-TOKEN. Now, if we inspect the code of the inertia_rails gem, we can see where the magic happens:
def copy_xsrf_to_csrf!
  @env['HTTP_X_CSRF_TOKEN'] = @env['HTTP_X_XSRF_TOKEN'] if @env['HTTP_X_XSRF_TOKEN'] && inertia_request?
end
Excellent! We have CSRF protection setup automatically!
This was a pretty simple POST scenario, but in practice, the backend would do all the business logic. For example, authentication, authorization, validation, etc. Let’s add some simple validation to the Post model (full code in commit 7 of the demo app):
# app/models/post.rb
class Post < ApplicationRecord
  validates :title, presence: true
  validates :body, presence: true
end

# app/controllers/posts_controller.rb
class PostsController < ApplicationController
  # [...]

  def create
    # example syntax using devise, redirects if fails
    authenticate_user!

    post = Post.new(params.require(:post).permit(:title, :body))

    # example syntax using pundit, redirects if fails
    authorize post

    if post.save
      redirect_to posts_path
    else
      # TODO: implement unhappy path. How?
    end
  end
end
Let’s tackle the unhappy path, when a record is not valid. The Inertia documentation states that we can’t use render but we have to do a redirection, and pass the errors in the flash. Now that seems cumbersome. Fortunately, the inertia_rails gem once again deals with it for us. This is not very well documented, but we can see the feature in the code here and here:
def redirect_to(options = {}, response_options = {})
  capture_inertia_errors(response_options)
  super(options, response_options)
end

def redirect_back(fallback_location:, allow_other_host: true, **options)
  capture_inertia_errors(options)
  super(
    fallback_location: fallback_location,
    allow_other_host: allow_other_host,
    **options,
  )
end

# [...]

def capture_inertia_errors(options)
  if (inertia_errors = options.dig(:inertia, :errors))
    session[:inertia_errors] = inertia_errors
  end
end
So that lets us do this:
# app/controllers/posts_controller.rb
class PostsController < ApplicationController
  # [...]

  def create
    # example syntax using devise, redirects if fails
    authenticate_user!

    post = Post.new(params.require(:post).permit(:title, :body))

    # example syntax using pundit, redirects if fails
    authorize post

    if post.save
      redirect_to posts_path
    else
      redirect_back(
        fallback_location: posts_path,
        inertia: { errors: post.errors.messages }
      )
    end
  end
end
And the errors get propagated as props. We can now display them in the frontend form:
// app/frontend/pages/posts/_form.jsx
import React from "react";
import { useForm } from "@inertiajs/react";
import { posts } from "@/api";

export default function PostForm() {
  // retrieve `errors` here
  const { data, processing, post, setData, reset, errors } = useForm({
    title: "",
    body: "",
  });

  const submit = (e) => {
    e.preventDefault();

    post(postsApi.create.path(), { onSuccess: () => reset() });
  };

  return (
    <form onSubmit={submit}>
      <div>
        <label htmlFor="text-input">Title</label>
        <input
          id="text-input"
          type="text"
          value={data.title}
          onChange={(e) => setData("title", e.target.value)}
        />
        {/* Display errors in the form */}
        {errors.title && (
          <div style={ { color: "red" } }>{errors.title.join(",")}</div>
        )}
      </div>
      <div>
        <label htmlFor="body-input">Body</label>
        <textarea
          id="body-input"
          value={data.body}
          onChange={(e) => setData("body", e.target.value)}
          rows="4"
        ></textarea>
        {/* Display errors in the form */}
        {errors.body && (
          <div style={ { color: "red" } }>{errors.body.join(",")}</div>
        )}
      </div>
      <button type="submit" disabled={processing}>
        Create
      </button>
    </form>
  );
}
And here we are, we have a form to create records and we can deal with the invalid flow.
As the title of this section may have foreshadowed, I’m pretty unimpressed with how Inertia deals with forms. The “errors in flash and redirect” sounds like a hack (or at least an afterthought). And the whole management with the useForm hook seems unnecessarily complicated. I wish that Inertia would provide a Form component like it does with Link and let us build it like a regular HTML form (You may - and should - still build this component yourself). At least inertia_rails is somehow mitigating the mess by abstracting away the flash errors for us, so there is that.
Conclusion
This was only a glimpse and a simple example, but I hope you got the idea. As of today, this is the best resource I have encountered to use a frontend framework as a thin layer, that only deals with presentation and almost nothing else.
I personally enjoyed working with Inertia. My preference is still server-rendered HTML, as most apps I work on are best suited for it. But I must say that Rails views with partials are sub-optimal to implement complex views with re-usable components. There are server-side component libraries, like ViewComponent or Phlex, and they definitely help.
But for projects having already invested into a frontend framework - and not desiring to do a rewrite - I think this is a fine way to have a slim use of the frontend framework.
[1] ↑ You will note that the author is the same person who wrote the vite_rails gem. He has also written a serializer gem, oj_serializers, that you may want to try for real-world serialization of props. If you use typescript, you can also leverage his types_from_serializers gem to auto-generate types (and once again, avoid a duplicated state between backend and frontend) which works well with oj_serializers.